
AFFILIATE DISCLOSURE
This post may contain affiliate links. An affiliate means Escribr may earn referral fees if you make a purchase through our link without any extra cost to you. It helps to keep this blog afloat. Thanks for your support!
Did you know that by visiting this blog, you are doing good in the world? READ THIS.
Whether you’re a seasoned transcriber or just starting out, there’s one thing we all love: adding value for our clients without breaking the bank.
Now, imagine going beyond top-notch transcripts to add captions to videos, creating fully captioned content that’s ready for social media, training materials, or professional use—all without spending a dime on expensive software.
Guess what? You can do this right now with Canva’s free captions feature. It’s a total game-changer, and I’m here to walk you through every step.
Let’s dive in and see how this simple tool can help you save time, attract more clients, and earn more money.
Why Captions Are a Must-Have 🎯
Video captions aren’t just trendy—they’re essential. Here’s why:
- They boost accessibility, making content friendly for viewers who are deaf or hard of hearing.
- They increase engagement on social media, especially since so many people scroll with the sound off.
- They enhance branding, giving your client’s videos a polished, professional edge.
By offering captions as part of your transcription services, you’re not just meeting your clients’ needs—you’re exceeding them.

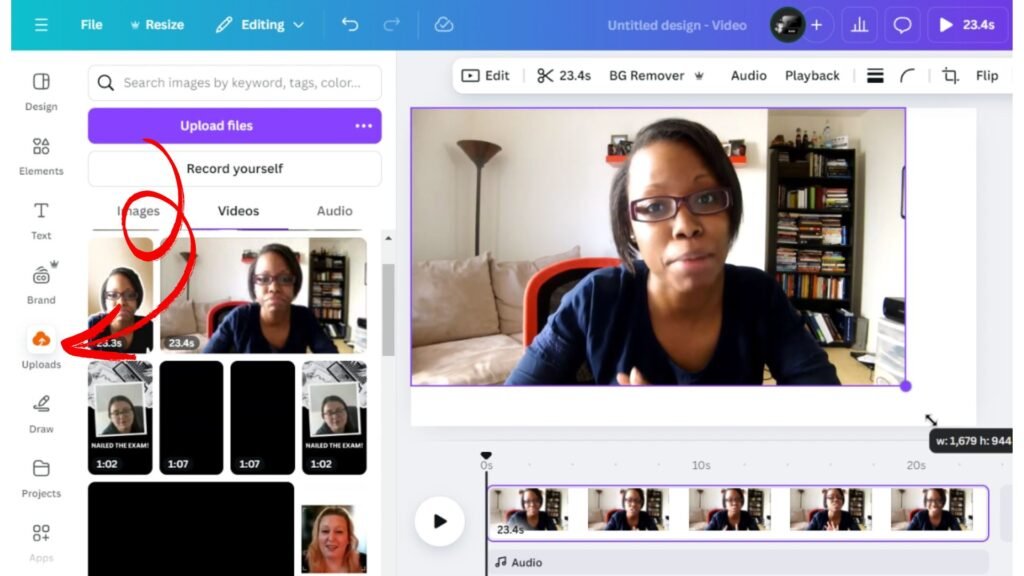
Step 1: Set Up Your Video Project in Canva 🎥
The beauty of this tool? It’s FREE—no premium subscription needed!
1. Log in to Canva (or create an account if you don’t have one yet).
2. Start a new video project. Choose a blank canvas or a specific format that fits your client’s needs.
3. Upload your client’s video and drag it into your project.
This works for all kinds of videos—social media posts, webinars, marketing campaigns, you name it.
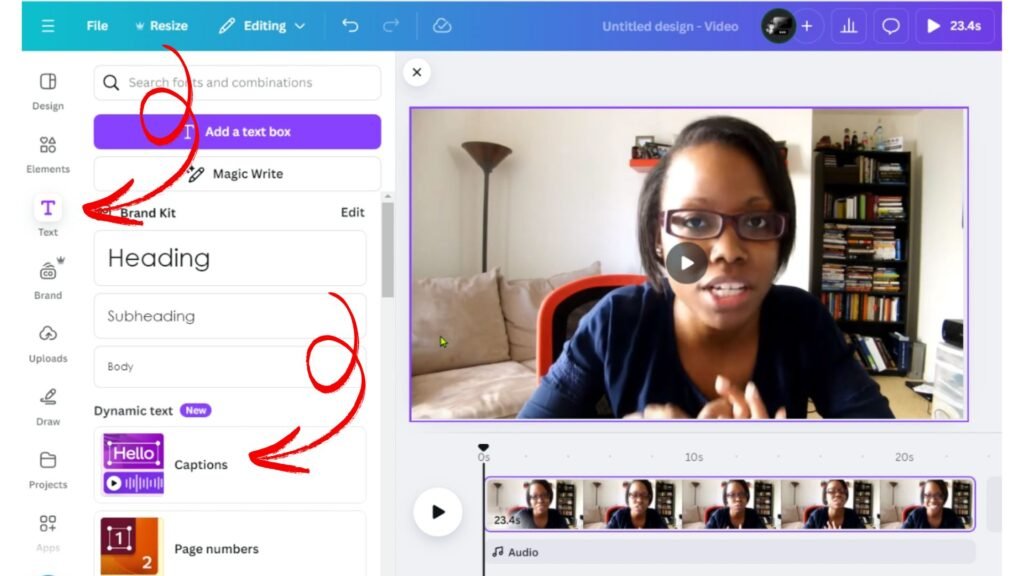
Step 2: Generate Captions in Seconds 🕒
Here’s where Canva really shines:
1. Go to the Text tab on the left-hand toolbar.
2. Under the Dynamic Text section, click Captions.

3. Select your video file and click Generate Captions.
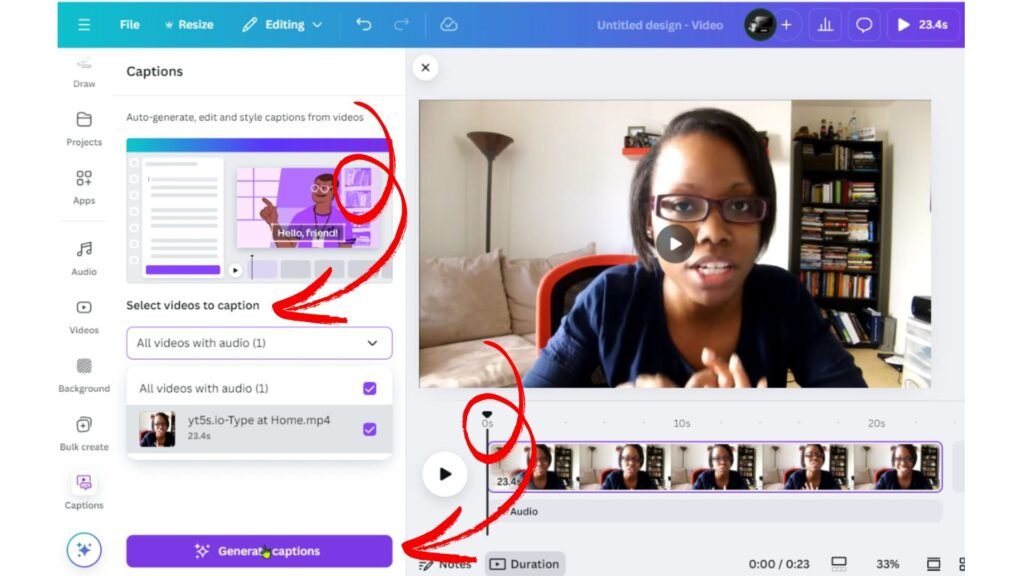
In just seconds, Canva will transcribe your video and create a caption track. While it’s impressively accurate, take a moment to review the captions for any errors or misheard words. Your attention to detail is what keeps clients coming back.
Step 3: Edit and Customize Your Captions ✏️
Time to add your magic touch:
- Edit for Accuracy: Simply click the text box to fix any mistakes.
- Brand It Up: Adjust the font style, size, and color to match your client’s branding.
- Polish for Style: Add effects like shadows or backgrounds for better readability.
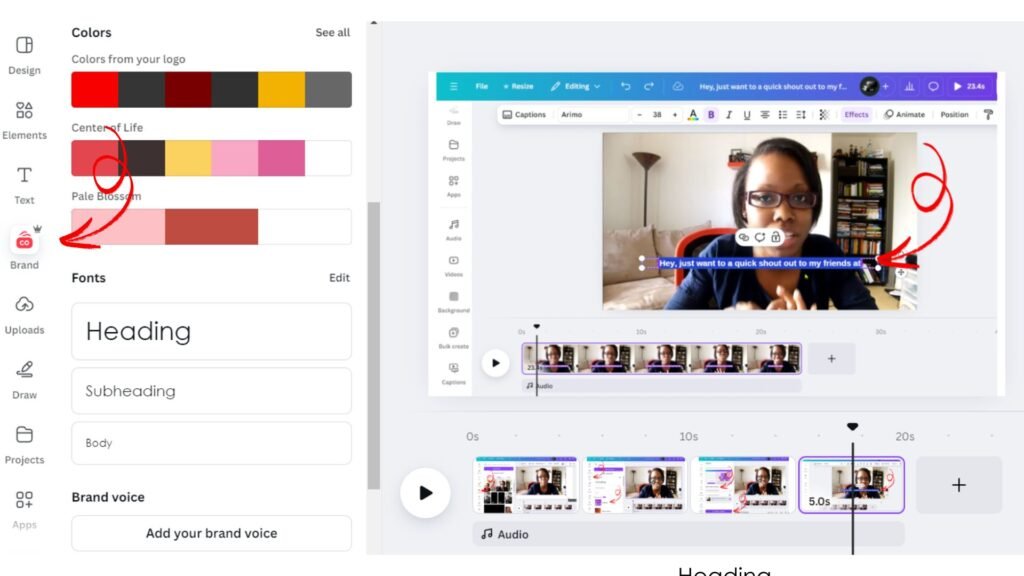
Pro tip: Consistency is key. Canva makes it easy to apply changes across the entire caption track, so everything looks sleek and professional.
Step 4: Add Creative Enhancements 🌟
Want to really wow your clients? Get creative with your captions:
- Background Styling: Add shadows or transparent boxes behind the text for readability.
- Frames and Borders: Position the video creatively, leaving space for captions below.
- Brand-Specific Formats: Match fonts and colors to your client’s unique style.
- Animated Keywords: Highlight key phrases with simple animations to make your captions pop.
These small touches can make a big difference, showing off your creativity and expertise.
Step 5: Fine-Tune for Premium Results ⚙️
Before wrapping up, take your project to the next level with these pro tips:
- Perfect Timing: Make sure captions sync perfectly with the video. Avoid trimming clips after captions are generated, as it can throw off the timing.
- Hidden Video with Captions Only: Overlay the video with an image or B-roll and leave captions visible for a unique, branded effect.
- Emphasize with Animations: Highlight key words in promotional or educational content.
Step 6: Deliver Like a Pro 🚀
Once your captions are polished and synced, you’re ready to deliver. Download the video in your client’s preferred format and let them marvel at your work. Canva’s captions may not allow fine-grained control over individual timing just yet, but for most projects, it’s more than enough to impress.
Wrap-Up:
Adding captions with Canva isn’t just easy—it’s a smart move for freelancers looking to stand out in a competitive market. By offering captioned videos as part of your packages, you’re showing clients that you’re ahead of the game, providing accessibility, engagement, and professionalism in one neat package.
So, what are you waiting for? Give Canva’s captions tool a try and start wowing your clients today.
Happy captioning! 🎥✨