AFFILIATE DISCLOSURE
This post may contain affiliate links. An affiliate means Escribr may earn referral fees if you make a purchase through our link without any extra cost to you. It helps to keep this blog afloat. Thanks for your support!
Did you know that by visiting this blog, you are doing good in the world? READ THIS.
Do you often find yourself struggling with poor audio quality when transcribing?
Are you frustrated by background noise, hissing sounds, and muffled voices that make it difficult to understand the audio?
If these challenges sound all too familiar, then we have some exciting news for you.
Introducing Adobe Podcast Enhance – a powerful tool designed to enhance podcasts, interviews, lectures, or any kind of audio for transcription. This groundbreaking tool promises to revolutionize your workflow and save you valuable time.
The Power of Adobe Podcast Enhance
With Adobe Podcast Enhance, you no longer have to worry about poor audio quality affecting your transcription accuracy.
This incredible tool is equipped with advanced features that can transform your audio files, making them sound as though they were recorded in a professional studio.
Removing Background Noises
Background noises can be a major hindrance when it comes to transcribing audio.
However, with Adobe Podcast Enhance, you can bid farewell to those pesky distractions.
This tool is capable of intelligently identifying and removing unwanted background noises, ensuring crystal-clear audio for transcription.
Normalizing Audio Levels
Inconsistent audio levels can make it challenging to accurately transcribe speech.

Adobe Podcast Enhance has got you covered in this aspect as well. The tool can automatically normalize audio levels, ensuring that every word spoken is audible and balanced.
Improving Speech Clarity
Muffled voices and echoey conference rooms are no match for Adobe Podcast Enhance. This dynamic tool leverages its enhanced speech feature to enhance speech clarity, making your audio files sound impeccable. Your transcriptions will now be more accurate and effortless than ever before.
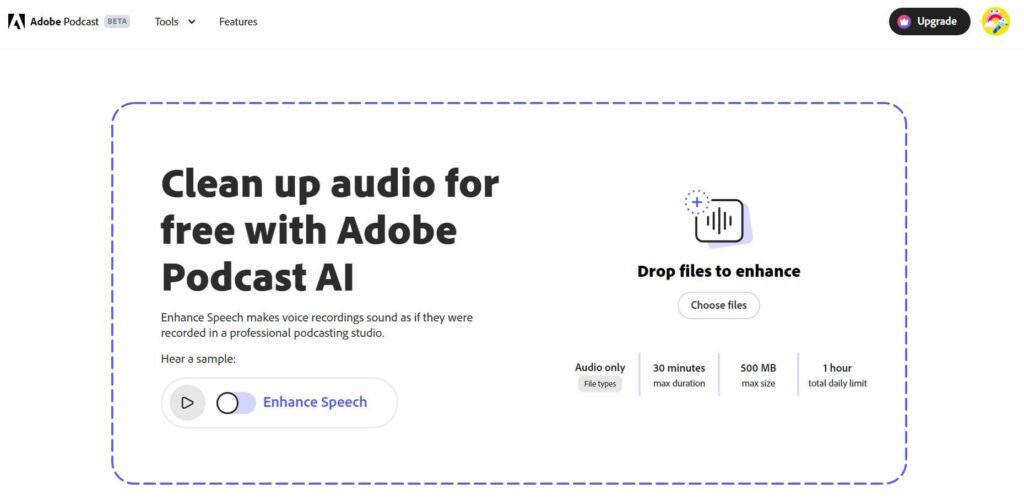
How to Use Adobe Podcast Enhance
Using Adobe Podcast Enhance is easy and straightforward. To get started, follow these simple steps:
- Open your web browser and visit podcast.adobe.com/enhance.
- Sign up for an account, if you don’t have one already.
- Click on the sign-in button and access the user-friendly interface.
- Explore the tool’s functionality and discover how it can revolutionize your audio quality.
Technical Details
To ensure a seamless experience, here are a few technical details you should be aware of:
- Maximum file size for upload: 500 megabytes
- Supported file formats: MP3 and WAV
- Maximum duration per upload: 1 hour
- Maximum total upload per day: 3 hours
Wrap-Up
Transcribing audio has never been easier thanks to the powerful enhancements provided by Adobe Podcast Enhance.
Say goodbye to poor audio quality, and welcome accurate and effortless transcriptions into your workflow.
Keep an eye out for more useful tips and tricks to improve your transcription skills in the future.
Happy transcribing, and stay tuned for more exciting updates!