AFFILIATE DISCLOSURE
This post may contain affiliate links. An affiliate means Escribr may earn referral fees if you make a purchase through our link without any extra cost to you. It helps to keep this blog afloat. Thanks for your support!
Did you know that by visiting this blog, you are doing good in the world? READ THIS.
Express Scribe is the most popular transcription software that transcribers use.
Here are 8 Express Scribe features you should be using to be more productive.
1. Copy Time
Some clients will require you to insert timestamps at a certain interval or every time a speaker changes.
You also need to insert a timestamp for indiscernible or unintelligible parts of the audio so that the client can easily go back to it and relisten and fill in the blank.
Timestamps look like this: [0:05:00]

You don’t want to manually type the timestamps every time because it’s going to be tedious.
To automatically insert timestamps, use the Copy Time feature of Express Scribe. It’s definitely a time saver.
- Click Options> Hot-Keys
- Click Add > Command > Copy Time > Change and Press a Key or a Key Combination (For example: F11)
- Click OK.
To copy the time from Express Scribe, press F11 (or any key you’ve selected) then press Ctrl+V.


2. Time Offset
Some clients will let you transcribe a video and timestamp the transcript using the burnt-in timecode.
A burnt-in timecode is the time you see embedded in the video.
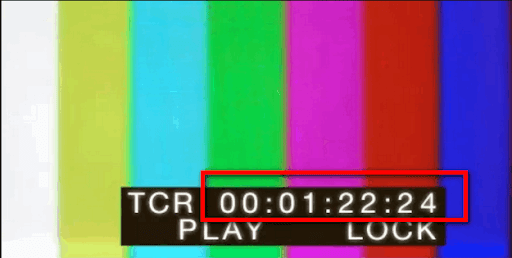
A burnt-in time code usually doesn’t start at 0:00:00:00.
So how do you synchronize the time on the video with the time on Express Scribe?
- Open Express Scribe.
- Click Options> Display.
- Set Position and Duration Format to hh:mm:ss.t (with leading zero).
- Load the audio, right-click it, then hit Dictation Information or Ctrl+I.
- Under Time Offset, enter the time you want to start the audio with then click OK.
3. Template Document
If you’re using different templates for different clients, it’s going to be easier for you to load it using Express Scribe.
- Go to Options> Other and check Use a word processor based on this file.
- Click Add, add your template, and select a template to set to default.
To load the template, click the little arrow next to the word processor icon and choose the template you want to use.

The template will automatically open.
4. Scribe Mini
Use Scribe Mini to easily access the controls while you’re typing.
- Go to View and click Float Above Other Windows.
- Click Scribe Mini or hit Ctrl+M.
5. Jump Time
Express Scribe’s Jump Time feature is useful when you’re editing and want to go back to a specific portion of the audio to re-listen.
- Copy the time by highlighting it and pressing Ctrl+C.
- Go to Express Scribe. Press Ctrl+J and then paste the time in the box provided for Time (Elapsed) by pressing Ctrl+V followed by the Enter key.
6. Bookmark
The Bookmark feature is very useful for audio with multiple speakers.
It can be very difficult to identify speakers if more than two people are speaking.
So sometimes you have to go back and re-listen to their voices to identify who is speaking.
You can use the bookmark feature to help you do this.
Let’s say, for example, you have four speakers:
Speaker 1 speaks at 0:00:00.
Speaker 2 speaks at 0:04:00.
Speaker 3 speaks at 0:08:00.
Speaker 4 speaks at 0:10:45.
You can bookmark each speaker for your reference later in the audio if you’re having trouble identifying who is speaking.
- To set a Bookmark, click Bookmark at the desired time.
- To choose a Bookmark, click Bookmark> Open Bookmark List.
- Select a bookmark.